Dry Brushing the Trench Pilgrim: Four Stages From Bare Plastic to Battlefield Filth
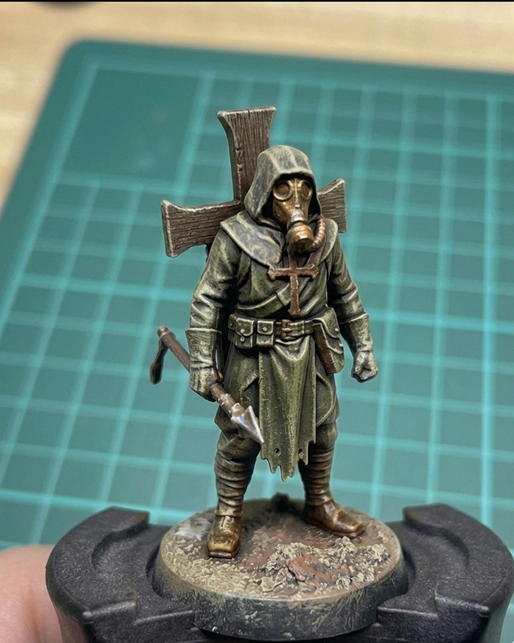
No blending. No glazing. No patience required. Dry brushing is the fastest route from primed plastic to a miniature that already looks like it crawled out of the mud. Four stages, four warcolours ranges, one thoroughly wretched Trench Pilgrim.
Why dry brushing wins the trench
You already know the technique. Load the brush, strip it almost bare, drag it across the raised surfaces until only the highest texture catches colour. What matters here is not the mechanics — it's knowing when dry brushing is the right call, and the Trench Pilgrim is exactly that case.
This is not a hero model asking for smooth non-metallic highlights and a blended cloak. It is a mass-produced horror in a gas mask, built to be painted fast and look wretched doing it. Dry brushing rewards exactly that brief: it finds every fold in a hood, every rivet on a mask, every splinter in a trench club, without a single hour spent on edge highlighting. The texture does the work the brush usually has to fake.
The model: a Trench Pilgrim in Muted Desolation
Hooded, gas-masked, dragging a heavy wooden cross and a trench club — the Trench Pilgrim is built for a palette we'll call Muted Desolation: worn browns, tarnished brass, bone, and mud. Nothing bright, nothing clean. Every colour choice below serves that brief.
The four stages
Stage one — the black undercoat
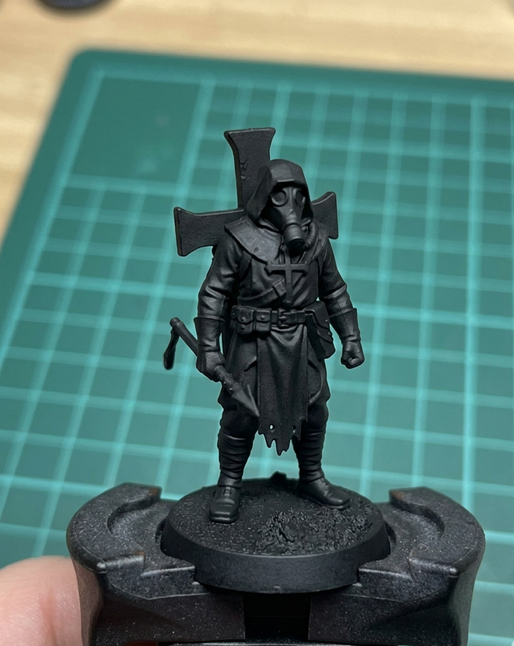
A uniform coat of warcolours Undercoat Black across the whole model. This is the foundation everything else keys into — it sets your deepest shadows before you've applied a drop of colour, and gives every later layer a surface it will actually grip.
Stage two — flat base colours
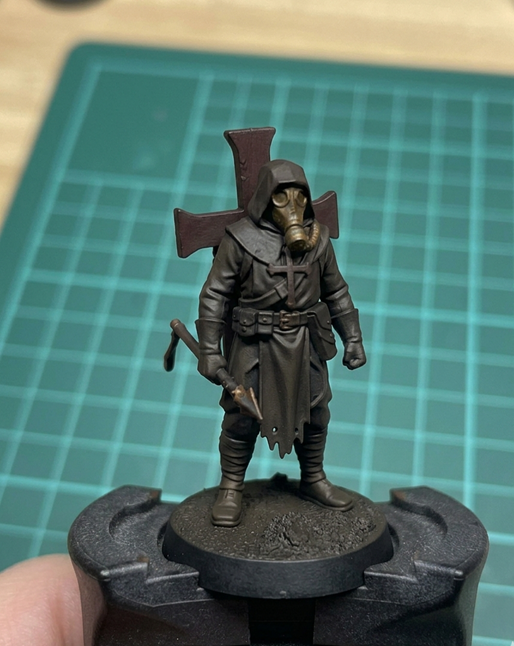
Over the undercoat, block in flat colour with no shading or highlighting at this stage — that's what stages three and four are for. Brown 4 covers the tunic and hood. The gas mask gets Antique Gold, read here as tarnished, corroded brass rather than anything polished. The wooden cross takes Brown 2, a warmer reddish-brown than the tunic so it reads as a separate material. Warm Grey 4 covers the base, dark enough that the black undercoat still holds the deepest recesses.
Stage three — dry brushing, the main event
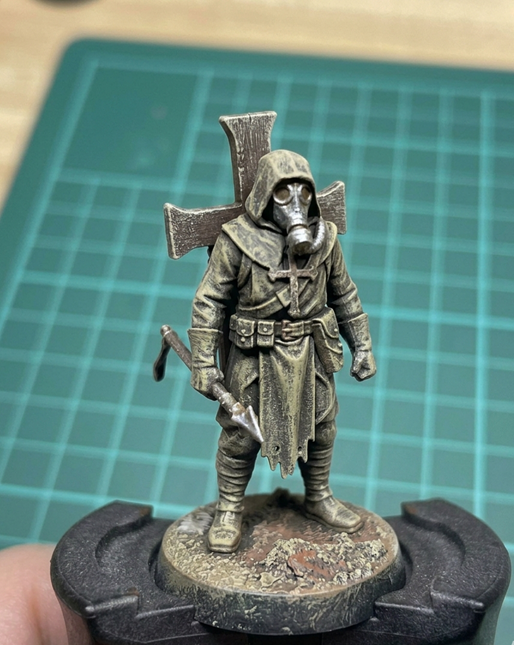
This is where the Drybrushin' range does the work no other line in the catalogue does as fast. Four passes, four colours, no blending required:
Tunic and hood: a heavy pass of Drybrushin' Olive Green over the whole brown tunic, catching every fold and seam. This is what turns a flat brown coat into something that reads as decayed, sun-bleached fabric.
Mask and metal: Drybrushin' Pewter along the edges of the gas mask, the trench club, and any exposed metal — enough to catch the highest points and suggest years of wear without ever looking clean.
Cross and hood peaks: a light pass of Drybrushin' Bone, reserved for the very highest points of the hood and the raised edges of the wooden cross. This is the brightest colour on the model and the least of it — restraint here is what makes it read as a highlight rather than a repaint.
Base: layered passes of Drybrushin' Sand and Drybrushin' Dark Ochre across the base, building up dry, dusty texture rather than the look of wet mud.
The whole figure should look chalky and over-textured at this stage. That's correct — stage four is what pulls it back together.
Stage four — inks and washes, the final polish
Dry brushing alone leaves a model looking chalky. This stage removes that, and it's non-negotiable — skip it and every hour spent dry brushing reads as unfinished.
Recess shadow: warcolours Shades: Black flowed into the deepest recesses — the folds of the hood, around the mask filters, inside the detail on the cross. This is what rebuilds the contrast the dry brushing flattened.
Warmth on brass and leather: warcolours INKredible: Umber over the gas mask and any leather straps, giving the brass real age and depth rather than a flat metallic sheen.
Enrich the tunic: a thin pass of warcolours INKredible: Olive Green ink over the dry-brushed tunic, deepening the khaki without burying the highlights underneath it.
Final weathering: warcolours INKredible: Burnt Sienna and Sepia worked into the base and the lower edges of the robe, making the rust and grime read as organic rather than painted-on.
What comes out the other side is a miniature where every fold is sharp, every shadow is deep, and the whole thing looks like it has been dragged through the trench it's named for.
What you used
Primer: Undercoat Black
Base colours: Brown 4, Brown 2, Antique Gold, Warm Grey 4
Dry brush: Drybrushin' Olive Green, Pewter, Bone, Sand, Dark Ochre
Finishing: Shades: Black, INKredible: Umber, Olive Green, Burnt Sienna, Sepia
Built for exactly this.
The warcolours Drybrushin' range is 45 colours deep, pre-mixed for texture work so you're never thinning a layer paint to get a dry brush consistency.
Written by the warcolours forge in Nicosia, Cyprus. From our hands to your brush.